Switching to an ergo-split keyboard
My old keyboard has been dying for months, maybe a year, even. It’s a Logitech G815. The thing that has been the most annoying as it has aged has been the volume roller registering phantom input and not registering intended input. Some of the keys started to get unreliable as well, so I decided it was time to retire it. My new job has me typing a lot more, so I wanted to try something new. Maybe I could stave off some of my RSI symptoms if I got something more ergonomic. After several months of doing research, I decided it was finally time to pull the trigger, so I bought a split ergonomic keyboard in the form of a Lily58 kit from Typeractive.
Picking the Lily58
In looking at what would theoretically feel better on my wrists where my RSI is most present, I found that there are several factors when it comes to creating a good typing position. One of the biggest things you can do immediately is separate your hands and keep your arms as straight as possible, with appropriate bends at the elbows. On a normal keyboard, this isn’t really possible, but if you chop the board in half, you can adjust to any width you like. Another ergonomic adjustment that isn’t really possible on a standard board is adjusting the angle. Not front to back, like most keyboards allow for, but from side to side. It’s advantageous to type on an angled board, with the thumb side of your hand higher than the pinky side. Many split keyboards have options for tenting feet that let you make that adjustment. The Lily58 fits both of these criteria, while also having enough keys to fit my preference. Many ergonomic split keybaords very few keys, which makes the emulation of a full layout difficult. The Lily58 has 58 keys, so with very basic layering, every function is available. I also wanted to stay away from some of the more expensive options. Like many hobbies, it feels like you can spend as much as you want on a keybaord these days.
This keyboard might come off looking pretty DIY and it is. The actual layout is open source (MIT License) and was designed by Kata0518 on Github, but you can buy the boards from a variety of sellers. Most places that sell the Lily58 simply print the circuit board for it and sell that. Maybe with the other components needed to make it function, but they often don’t assemble the boards at all. Typeractive offers a half-built option. They do the difficult and tedious soldering of the diodes and hotswap switch sockets and you solder the much easier controllers and displays. The key switches and keycaps themselves are all press-in. This was the biggest reason I went with them. The other major reason is that they have a customized Lily58 option that uses Kailh Choc key switches, which are lower profile than the standard Cherry MX style switches you may know well from most mechanical keyboards. The lower profile switches tend to fell better to me. My old keyboard used Logitech Romer-G switches, which felt like low profile Kailh switches anyway, so the sound and feel of my new keyboard feels familiar in a good way.
Building the Board
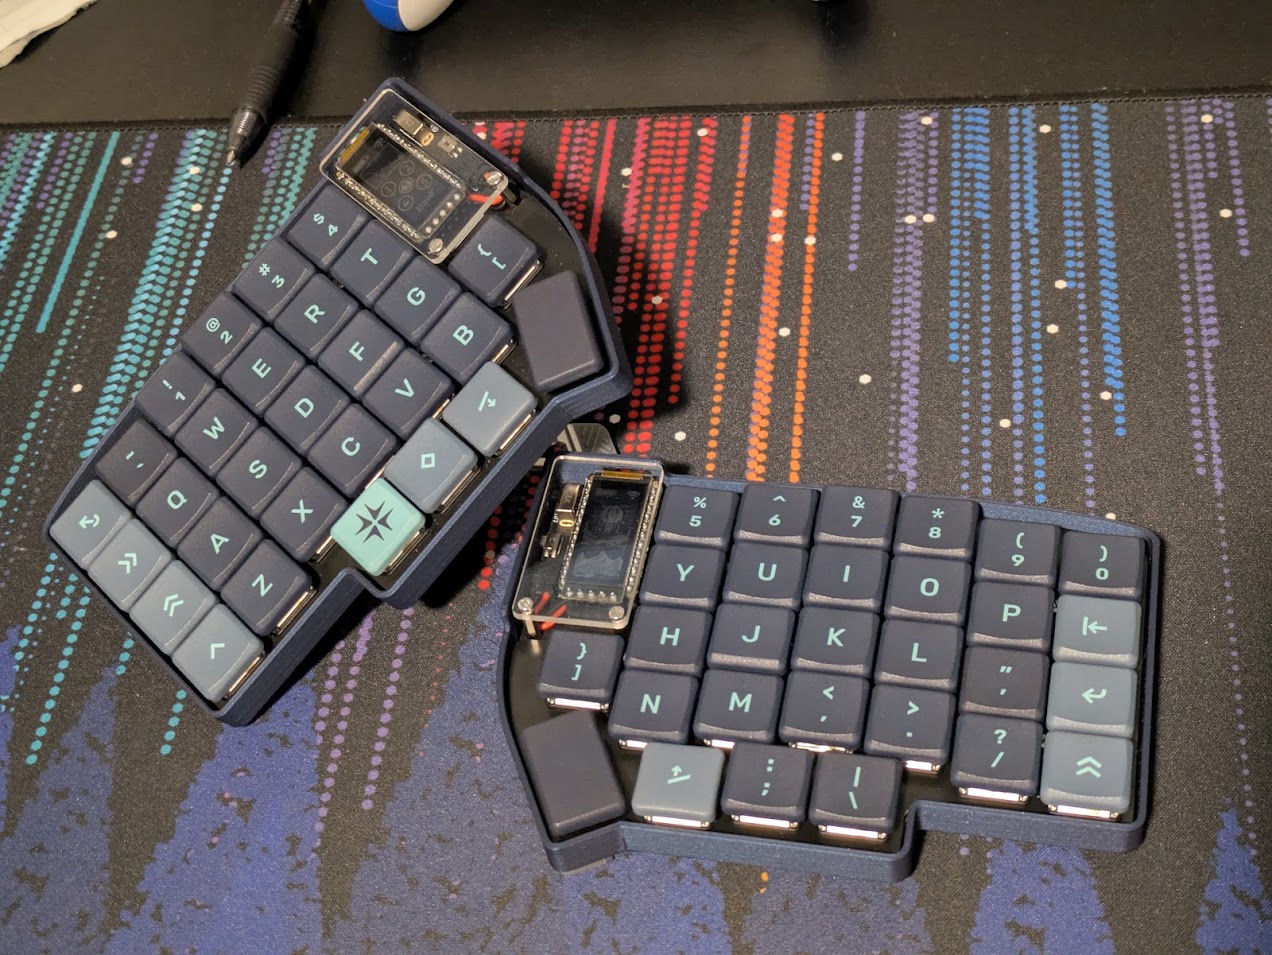
The board came in several parts. In the box, I got the PCBs, top plates, 3D printed cases, sixty Kailh Choc white switches, a set of MBK Hypersonic keycaps, a pair of Nice!Nano controllers, a pair of batteries, a pair of Nice!View screens, a set of four tenting feet, and a pair of acrylic screen covers, as well as the hardware required to get it all together.
The process for building the board went pretty easily. I’d never soldered pins like these before, but once I got the hang of it, all the joints went together well. It’s always fun for me to learn a new skill, and now I’m itching to do more projects like this. After everything was soldered, it was a simple matter of pressing in the switches and screwing the case together. In the end it took me a couple hours across two days, but I’m very happy with the result.
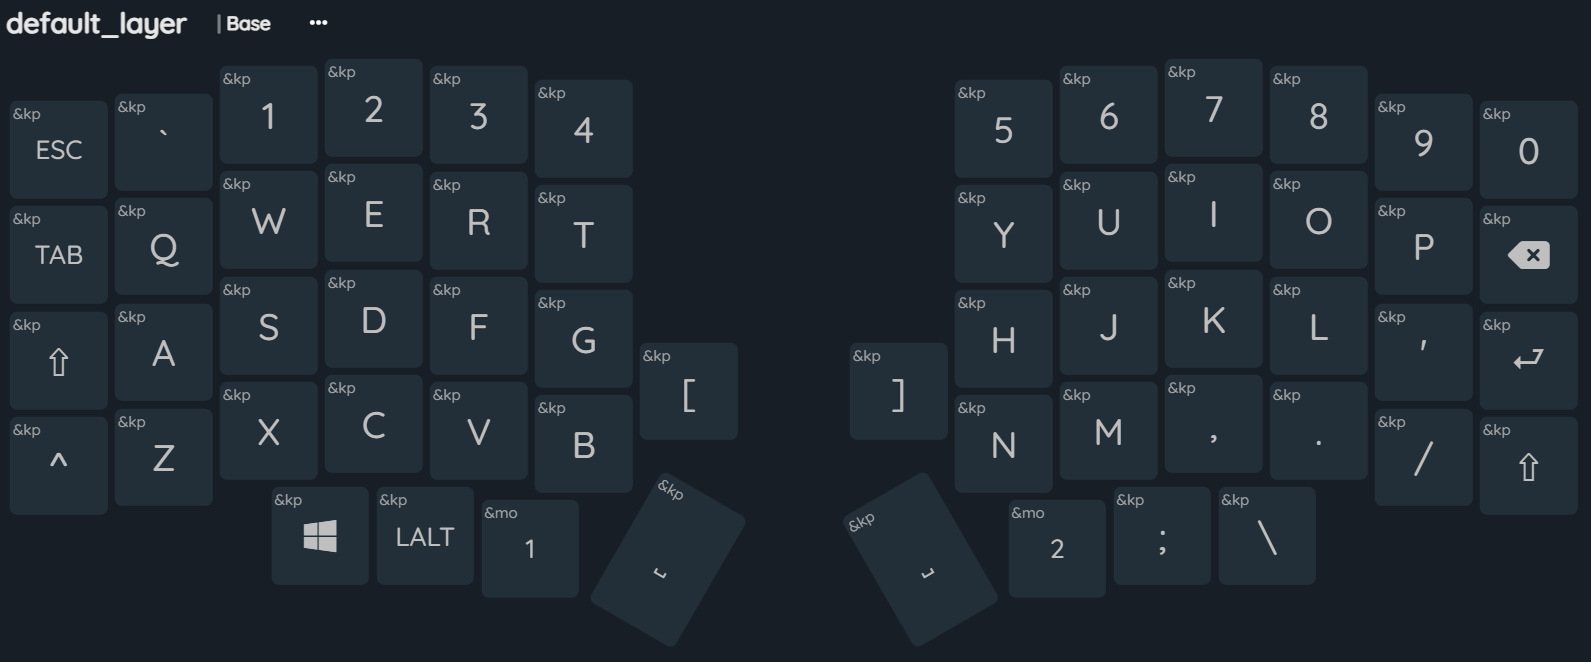
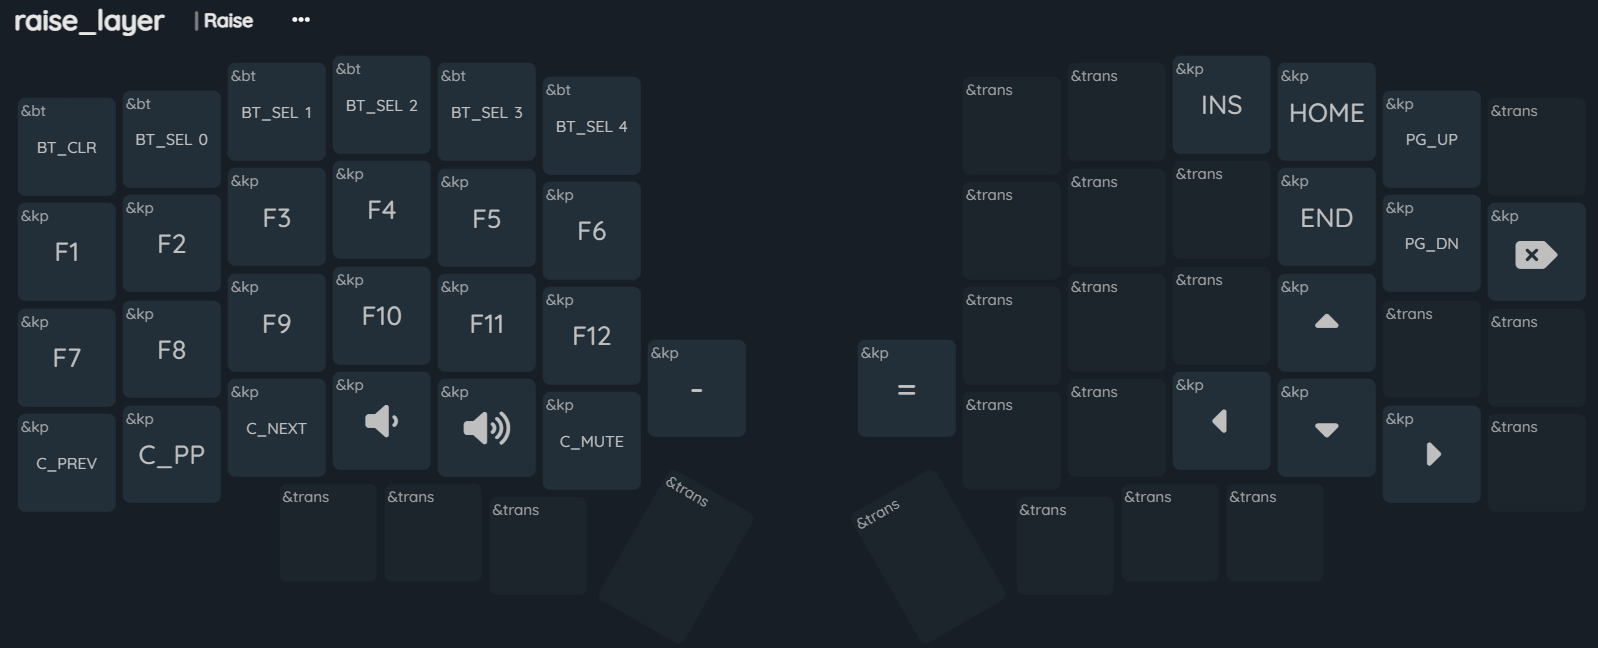
The Nice!Nano modules use ZMK firmware, which is an open source standard. I don’t really have a horse in the race between QMK/ZMK, but working with ZMK was super easy. I used the online keymap editor made by Nick Coutsos to generate it. My layout is fairly simple. I have most things available on the base layer, with a numpad, arrow keys, media keys, bluetooth settings, and function row available on the raise/lower layers. I’m not completely happy with it. Having the esc key in the number row isn’t great. My muscle memory is always off by one key in that row. I think it’s not the best layout, but I like it so far otherwise.
Adapting
Getting used to the Lily58 has been a challenge. It has really illuminated some bad typing habits. I don’t use my pinky fingers as much as I probably should and I move my hands across the board a lot. These habits are bad, ergonomically, but have been very difficult for me to kick. I still mistype more often on the 58 than on my work laptop or standard keyboard and I’m slower there too. I have been improving though, and now I catch myself sometimes typing for several seconds at a time without looking down or stumbling. I’m sure that as I type more, I will keep getting better and I’m looking forward to it.